How to resize an image for your website
When & why do we need to resize our images?
Different image areas of your website will require different image sizes.
Some of these areas will allow the whole image to fit, but sometimes the image area requires your image to be resized.
Your website will automatically resize your images, but it is better to resize your images to the correct dimensions before uploading to your website. This ensures the file size will be small, and that the image will display exactly as intended.
Preparing images is of particular importance if the image is an unusual size – for example your page header banner image may be a wide and short size such as 1600 pixels wide x 450 pixels high.
Sometimes editing images can seem tricky and you are a graphic designer, chances are good you won’t have any image editing software installed. This is where PicMonkey comes in.
How to Crop an Image
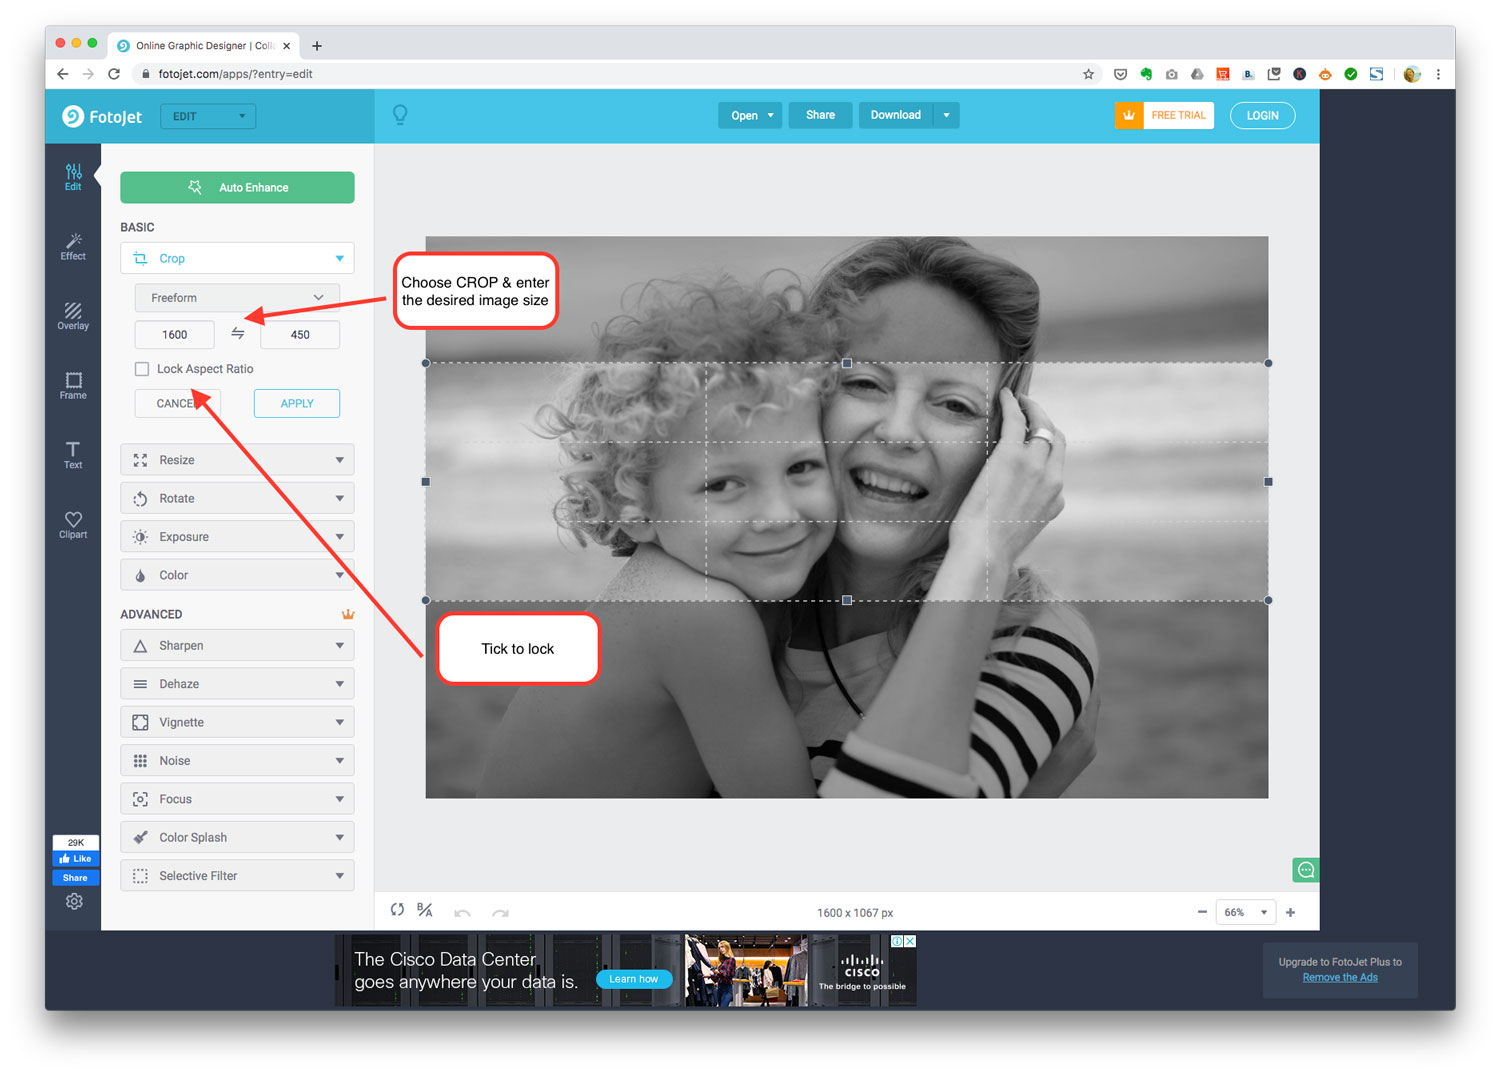
1) Go to https://www.fotojet.com and find the edit button
2) Then select the crop tool, enter the desired dimensions, and crop away. (Note the that uploaded image should be larger than the size you want to crop to, otherwise it will become stretched.)

3) Then click DOWNLOAD to save it. Too easy.
There are many alternatives to Fotojet. We have chosen a few, listed below.
These online photo editors are all super easy to use and free!
- Fotor
- Colorcinch
- BeFunky
- Pixlr Express
- Bulk Resize Photos (if you have lots of images to resize))
Other Options
If you have a MAC, you can use PREVIEW to resize an image – here’s how.
Or, you might have photoshop on your computer – see here.
Also see:
How to optimise your images for SEO
NEED SOME HELP PLANNING YOUR NEW WEBSITE?
Download your FREE WORKBOOK
& start creating your new site.
Download FREE today
